


Every kid should have a backpack that perfectly matches their vivid imagination, carries all their essentials, and helps them express themselves. When you help your child customize their own backpack, they get all of this in one. The best part? Petite ‘n Pretty has everything they need to get creative and design a bag that fits their style. (That’s right—we don’t just sell kids’ makeup!) Read on to find out how it’s done.
5 reasons why you should customize a backpack with your child
If your child is attending virtual school at home this year, you might not think they need a new backpack. But if you think about it, the benefits of this activity go beyond taking books to and from class. Here are a few reasons why we at Petite ‘n Pretty HQ have been making backpacks with our own families.
Personalizing a backpack is...

- A fun birthday party activity: Having a socially distant birthday party? This is a great activity option that everyone can do six feet apart! Each party guest can create their own backpack without touching the same materials used by others.
- A family bonding activity: Parents, grandparents, or older siblings can spend a fun afternoon at home helping kids create their own personal backpack. The backpack will always serve as a sweet memento of good times spent getting creative with family.
- A perfect gift: If you’re looking to buy a gift for your kid, tween, or teen—for their birthday, back to school, or the holidays—a backpack customized just for them can serve as the perfect gift. (Especially if it’s stuffed with one of our makeup gift sets or eye and cheek palettes!)
- A way to stay organized (and inspired) for virtual learning: Even if your child is attending school on Zoom, a backpack still serves as an essential organization tool that keeps school supplies close at hand. A customized backpack is even better. It’s an uplifting reminder of their creative strengths when virtual-school stress sets in.
- A must-have travel accessory: Once we’re able to go on family vacations, sleepovers, and school field trips again, your child will need a backpack to stash all of their stuff—preferably one that no one else will have!
How to create a unique, customized backpack for school
1. Gather your supplies

The first step in personalizing a backpack is to round up the required materials. You can use any backpack as your canvas for this project.
But if your child loves pink, you should check out the Petite ‘n Pretty Backpack. It’s got room for all their school swag—including their Cloud Mine Rollerball fragrance and Study Haul Back-to-School Makeup Set.

Then, find some backpack decorations that your child loves. Once again, we’ve got you covered in this department. The Petite ‘n Pretty Patches Set comes with 10 super-cute patches, including a California license plate, sunglasses... and a 10K Shine Lip Gloss, of course.
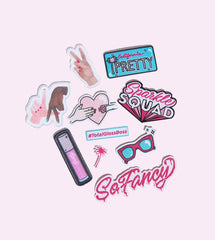
If you have patches left over once you’ve customized your backpack, you can put them on a jacket, makeup bag, lunch bag, or any other sturdy cotton or polyester fabric surface.
Next, pick up some fabric markers—we’ll tell you why in a minute.
Finally, you’ll need an iron to attach the patches to your backpack.

2. Write your child’s name on their backpack
A customized backpack wouldn’t be complete if it didn’t have the owner’s name on it! To begin, have your child write their first name or initials somewhere on their backpack using fabric markers. If they have an artistic streak, they can also doodle on their backpack using the fabric markers. Just be sure to leave enough free space to place the patches.

3. Lay out the patches
Now, it’s time for your child to decide where they want their patches to go. Place the backpack on an ironing board and play around with different patch combinations and layouts until your child finds an arrangement they really love.
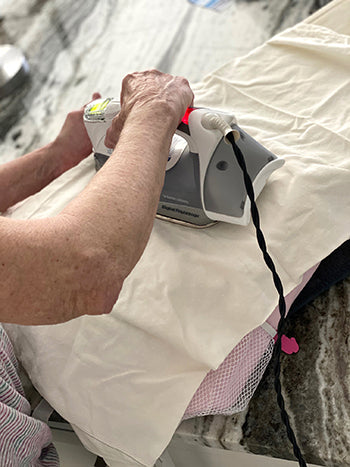
4. Iron on the patches
Turn an iron on high. Once it’s fully heated up, place a cotton pillowcase over the patches and press an iron onto each patch for 30-45 seconds. Be sure not to move the iron around!
Then, unzip the backpack and do the same thing on the reverse side of the patches.
Once the backpack is completely cool, it’s ready to use!

5. Share your backpack with us!
We love seeing how your child expresses themself with Petite ‘n Pretty products. If you do this DIY backpack tutorial, post it on social media and tag us at @petitenpretty!
We can’t wait to see what your child comes up with—incredible makeup skills are just the beginning of their artistic brilliance!

